Step-by-Step Tutorial: Creating a Credit Approval Workflow
Welcome to this tutorial where we'll guide you through setting up and using Abstra Workflows to automate business processes using Python. This tutorial is designed for new users and will provide a practical example of creating a credit approval workflow.
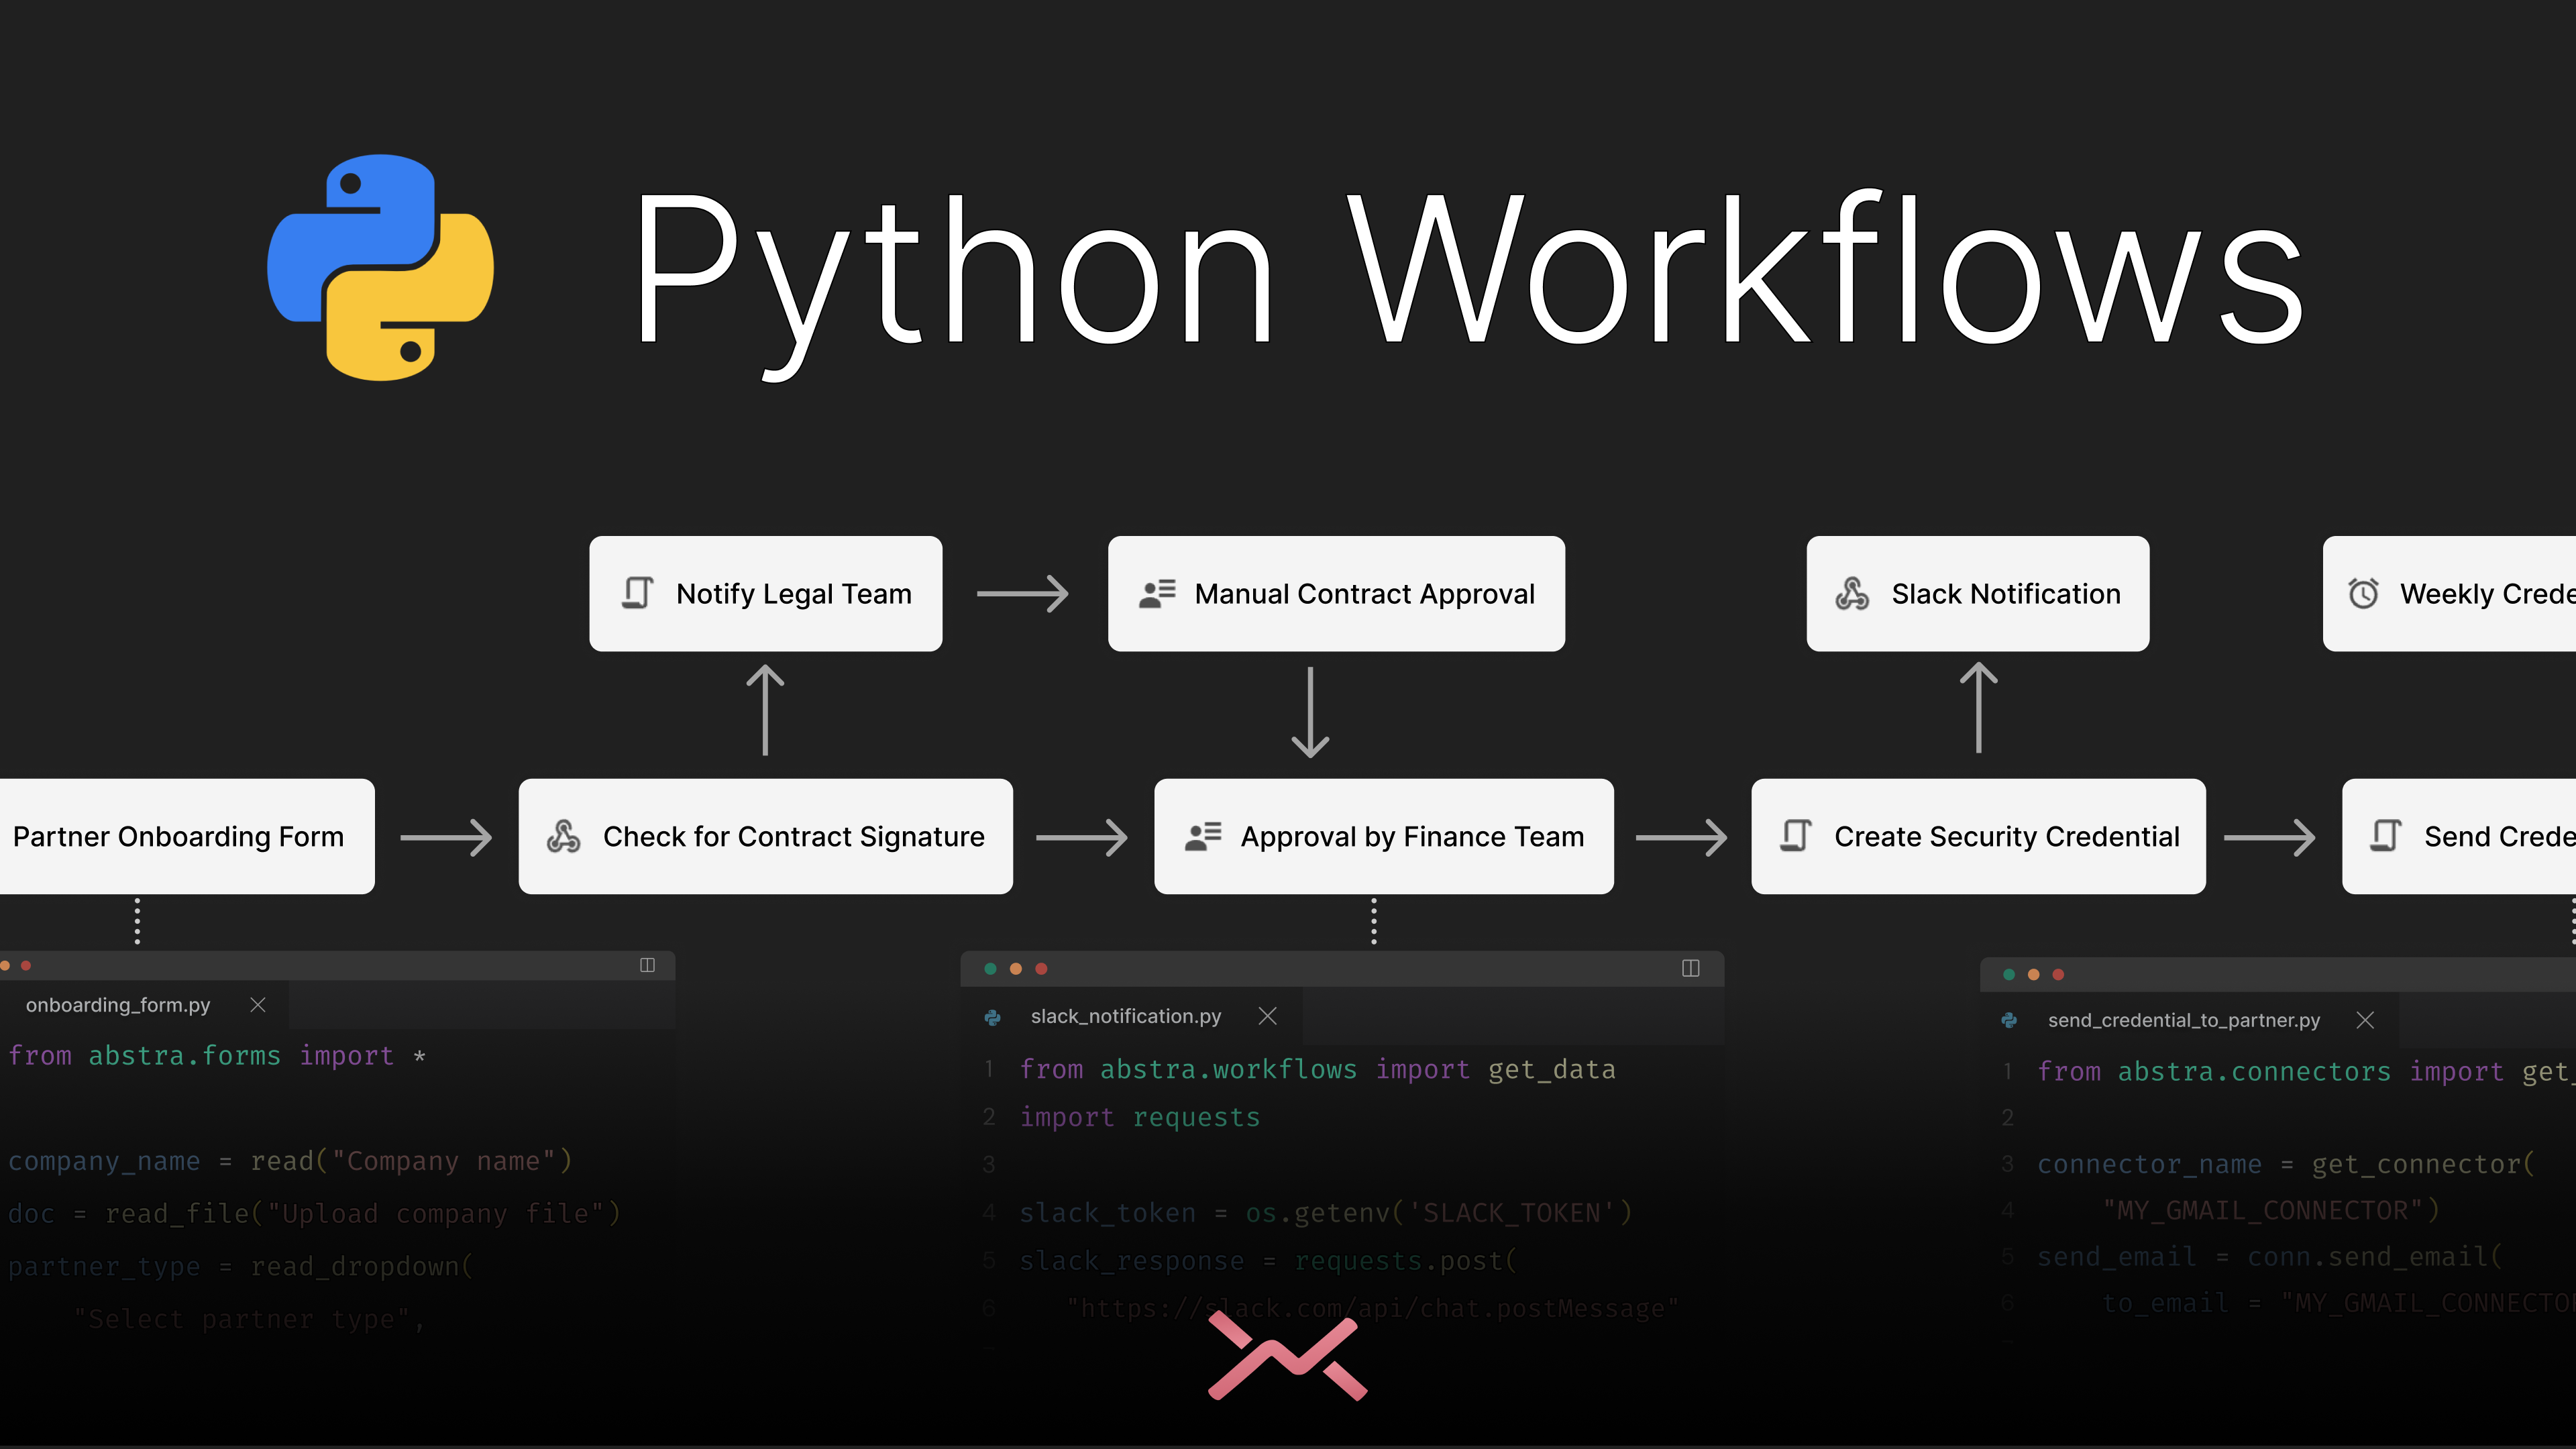
Access the entire project source code here.
Step 1: Installing Abstra
First, you need to install Abstra on your machine. Open your terminal and run the following command:
This command installs the Abstra CLI, which is essential for starting and managing your projects.
Step 2: Starting Your Project
Once Abstra is installed, you can start a new project by navigating to your desired project directory and running:
This command launches the Abstra editor in your browser and automatically creates a project directory with necessary Python files and a .abstra.json file for managing workflows. If you'd like to run Abstra in an existing directory, you can navigate to that in your terminal and run the abstra editor from within that.
Step 3: Understanding Workflow Components
Abstra workflows consist of various components:
- Forms: For user interactions, such as inputs and displays.
- Hooks: For external system interactions.
- Jobs: For scheduled tasks.
- Scripts: Triggered by other scripts in the workflow.
Step 4: Creating a Credit Approval Workflow
Let's create a workflow for credit approval, which involves form submission, data processing, and manual review.
4.1 Creating a Form
Navigate to the Stages page in the Abstra editor and click on "Create new" then select "Forms". Name it "Credit Request Form". This action automatically generates a Python file for handling form inputs.
Use Abstra Forms module widgets to create the user interactions, and Abstra Workflows to store the data.
Here's an example of how you might set up the form and store the data for processing in the next stages:
4.2 Processing the Data
After the form submission, you need a script to process the data. Create a new script named "Scoring" and link it to the form's output. Here's a basic example:
4.3 Adding a Manual Review Step
If the decision is "Pending", you might want a manual review. Add and link to a new Conditional stage, and name your stage "Decision".
In the Conditional stage settings, edit the variable that decides which next step should be taken. In our case, let's use the variable decision.
Then, create another form named "Manual Review" for this purpose, and link your "Decision" stage to to that, defining the transition (arrow) as decision == "pending".
You can now add form logic to your newly created "Manual Review" form to retrieve the data from the previous steps, and handle how the manual review should run.
Step 5: Deploying the Workflow
Once your workflow is set up, you can deploy it using the Abstra Cloud Console. Navigate to the console through the editor's navbar and press "Deploy". This action makes your workflow live and ready to use.
Step 6: Testing and Iteration
Test your workflow by navigating through each stage and ensuring that data passes correctly between forms and scripts. Make adjustments as needed based on the test results.
Final thoughts
This tutorial provided a basic overview of setting up a workflow in Abstra. You can expand upon this by integrating more complex logic, adding more stages, or connecting to external APIs. Abstra's flexibility and Python-based setup make it a powerful tool for automating a wide range of business processes.
If you'd like to understand how to adapt this workflow to your needs, you can book a technical onboarding here.