


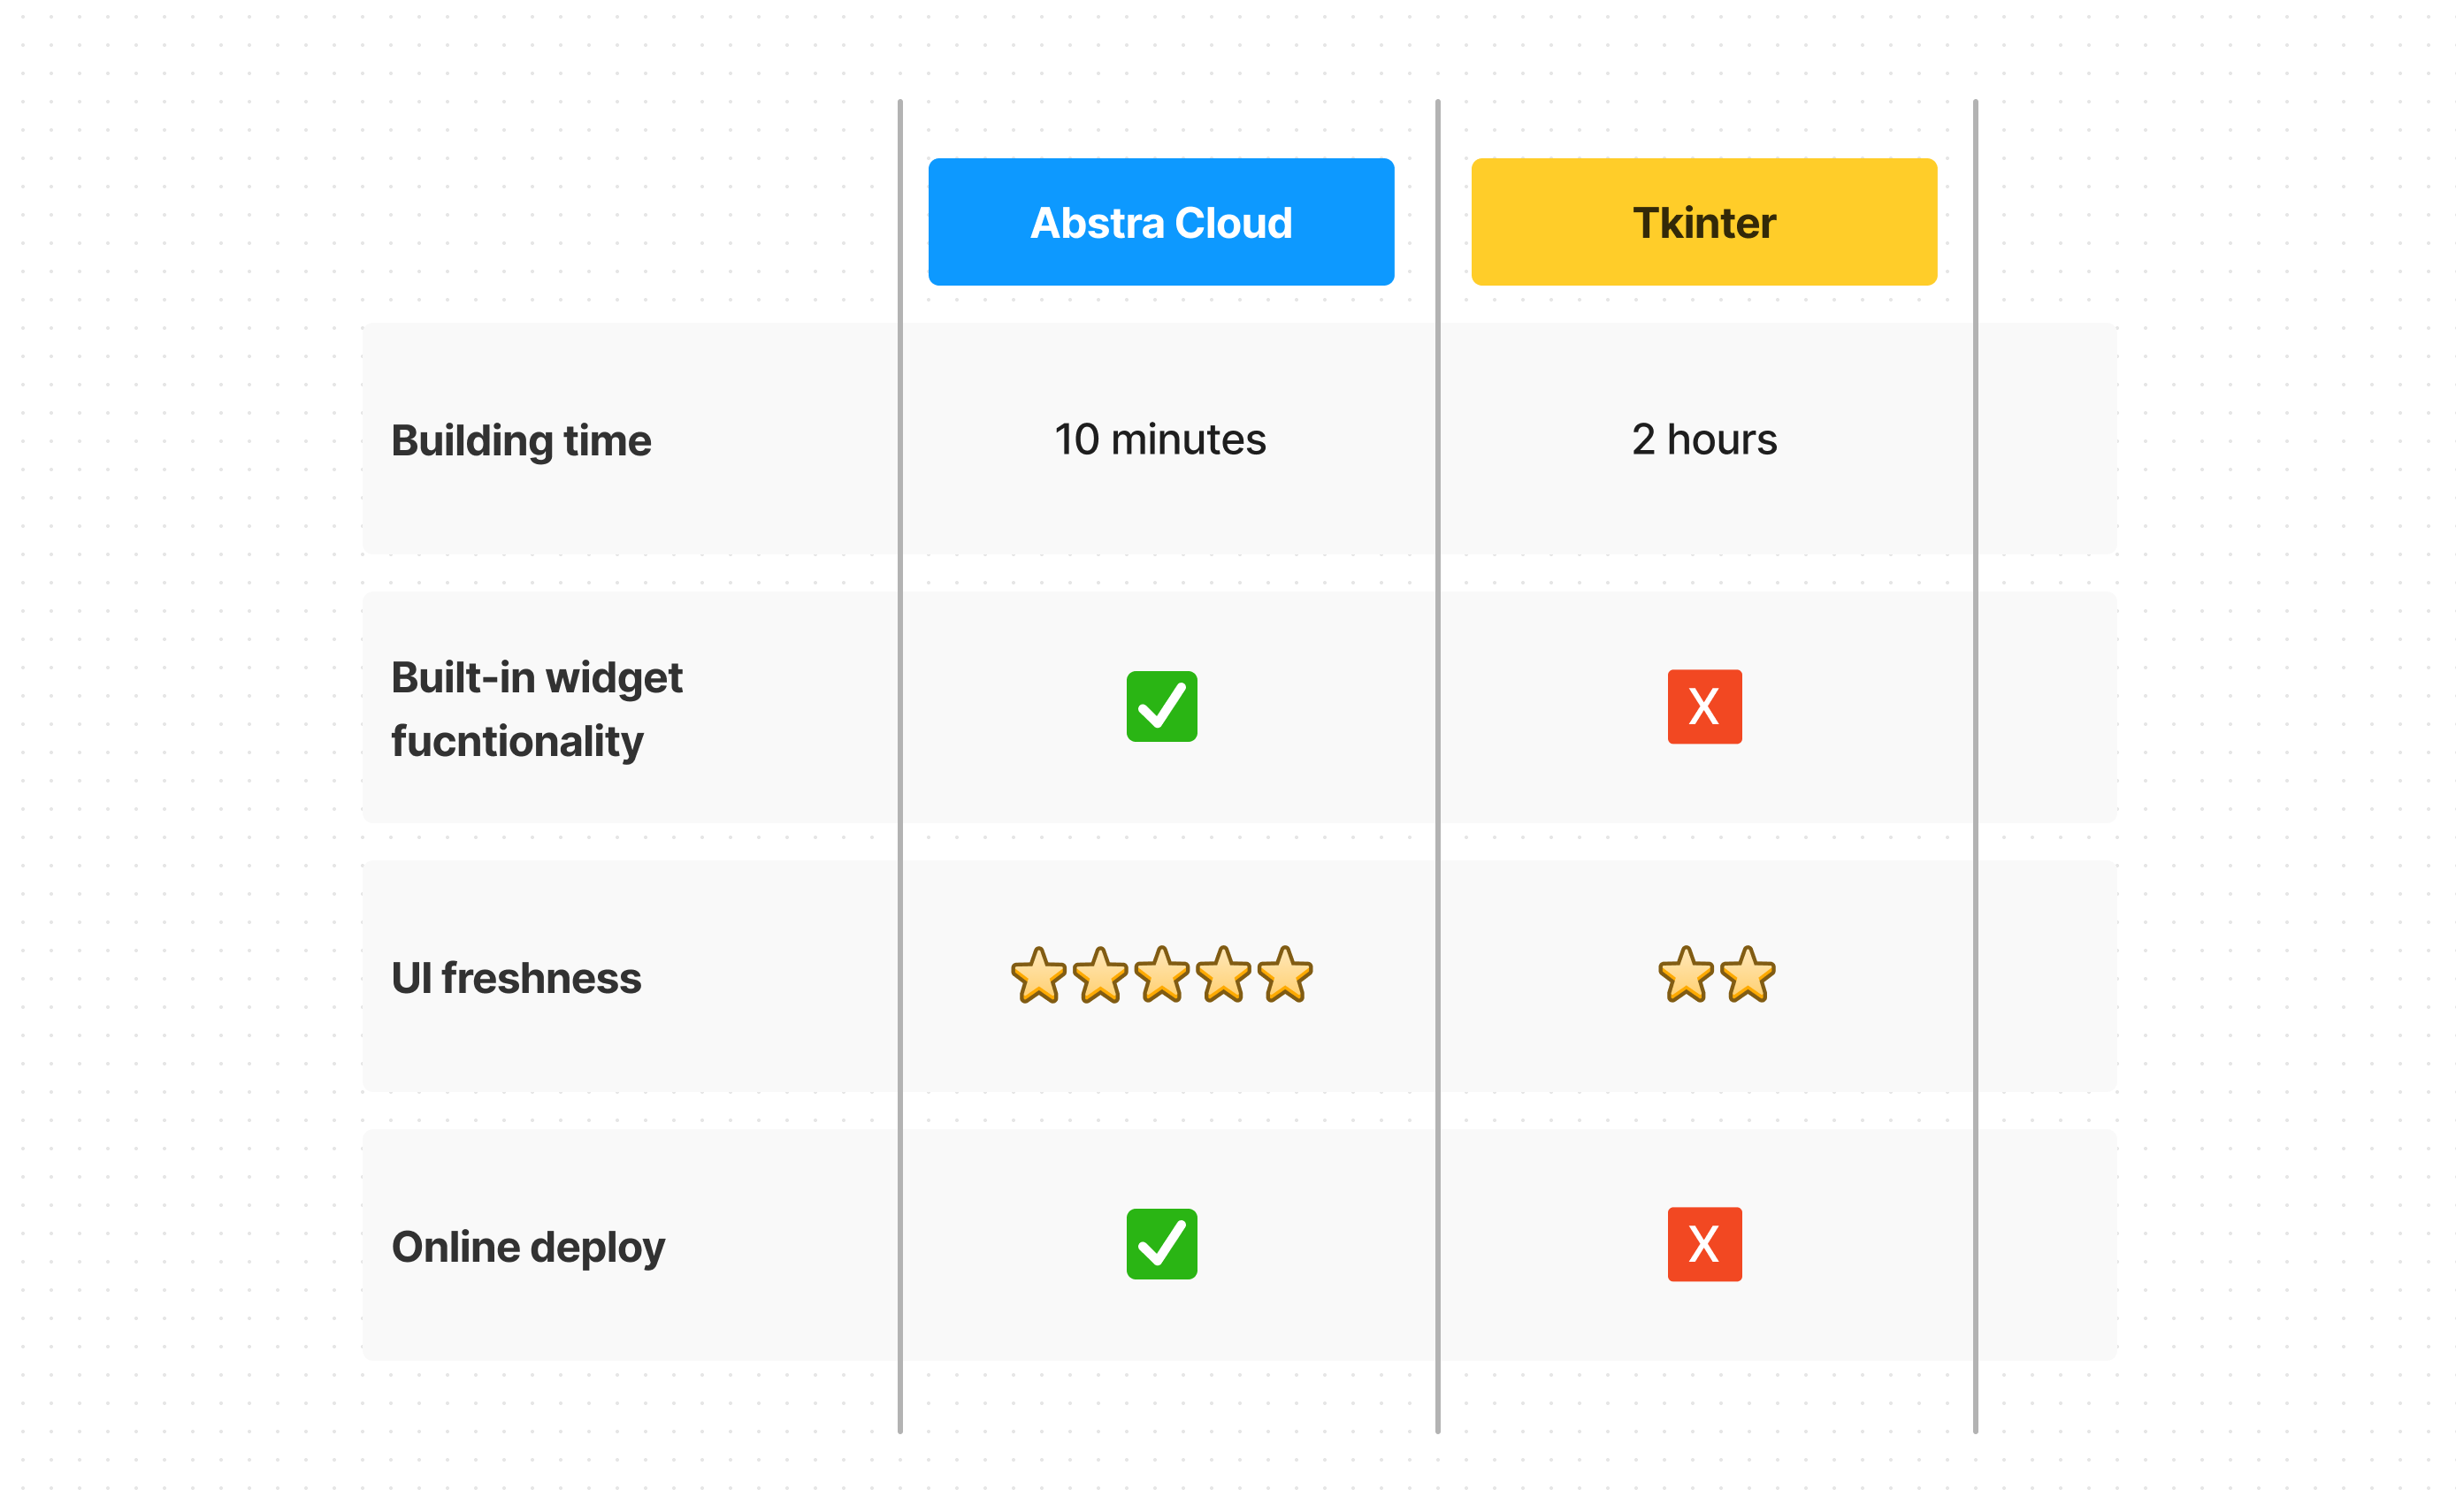
TL;DR
Tkinter
- Is built into Python, requiring no installation.
- App appearance is customized within your script - albeit the outdated look-and-feel.
- To create a functioning widget, you must configure type validation and how to retrieve each user input within your code.
- UI functionalities such as clicks, hovers and multiple selection must be bound to widgets using events and event handlers.
- Responsivity needs to be set in the code.
- Is run locally, as a desktop app.
- Widget placement is totally customizable, which comes with great freedom but heavy specification and implementation.
- Once your calculator app is opened, it will run indefinitely until the window is closed.
Abstra
- Available for install on pip, or can be run on the online console.
- Customize app appearance using no-code selectors for background, font, and more.
- Widgets come with built-in validation, and can be assigned to a variable for use in the script.
- All UI functionality is built into the available widgets and called with it in a single command.
- Responsive by default.
- One-click deploy to a shareable URL.
- Freedom to place widgets around the screen is limited, which allows for faster building but less customization options.
- Since scripts in Abstra are read sequentially, each form run will execute one calculation.
Hello Tkinter
The usual course in a Pythonista’s journey is to step out of the output-in-terminal experience and build a GUI app - a user-interface that interacts with your script. It abstracts the code behind the program, allowing users to give commands through graphic elements instead of typing up command-line inputs.
Tkinter is a go-to choice, famous for being relatively simple, cross-platform and coming pre-installed with Python. A note-worthy criticism is the interface’s look-and-feel, quite outdated in terms of modern app design. Still, the great incentives, especially for beginners, make it a good option for a simple, functional GUI.
Step-by-step comparison
Let’s take a look at how to build the same simple calculator using Tkinter and Abstra Cloud’s Forms, comparing the most important steps. We’ll also check out the full-code for both apps at the end.
Setting up
First things first: libs must be imported. The tkinter lib comes bundled with Python, so it can be imported directly without any further installation.
Abstrais available via a quick pip install: pip install abstra on your terminal. Use the command abstra serve .{directory-name} to run our editor locally.
Building widgets in Tkinter
On to the main show: building the UI.
Tkinter is organized in windows and frames, so those must be set up to get started. We made the window fixed size, to avoid dealing with responsivity.
Each element must always be assigned a master in which to be placed, ie. a frame or window. In order to build the number inputs in our calculator, we’ll create a frame and place Entry and Label widgets inside.
Tkinter has multiple customization options when it comes to specifying widget placement and organizing elements on the screen. But with great specification comes great responsibility…
The lib’s geometry managers are used to build layout, each one serving a purpose and accompanied by their specific arguments: .pack(fill=tk.Y, side=tk.LEFT), .place(x=140, y=1140, grid(row=2, column=5, sticky="n"), etc.
We’ll use .grid() to place the Label and Entry widgets stack on top of each other (same column, different rows):
We’ll repeat the same process to build the operations buttons. However, we must include a few extra steps when building the grid in order to have a more polished look, including padding and a widget that spans multiple columns: padx, pady, columnspan.
For the last step in building UI, create the Label which will display the result and set up the main grid to organize the frames.
Finally, we must make the widgets we created functional. To do so, we must use a GET command to retrieve each Entry, transform them into int, calculate the result, and then show it on the Label. For that, we’ll create one function for each operation, and add them to the beginning of our code:
Building widgets in with Abstra's Forms
Abstra's Forms uses ready-made widgets that build UI with a single line of code.
The read() widgets receive user input in multiple formats, validating their types automatically and avoiding the need for GET functions. Display() widgets show any type of useful information on the screen.
To receive the selected numbers and operation, we’ll use the read_number and read_multiple_choice widgets, adding the labels we want as arguments.
To make the calculator more practical, we’ll apply the Page() class to display everything on the same page and assign each answer to a variable:
That’s most UI done in just 6 lines of code.
The logic can be added with simple 'if' statements, followed by a display() widget with the desired calculation and result. To add some customization, we’ll use the button_text argument to add some fun phrases on the buttons, and that’s it!
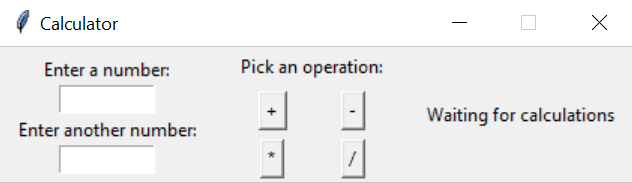
Running the app
Our project on Tkinter can be run on any computer’s terminal, Python shell or IDE. While this is easy for tech-savvy users, most non-programming folks might be intimidated to interact with code. To turn your script into a full program, you must turn your .py file into an .exe fie, using a lib such as Pyinstaller. When opened, the calculator will run indefinitely, until you close the window.
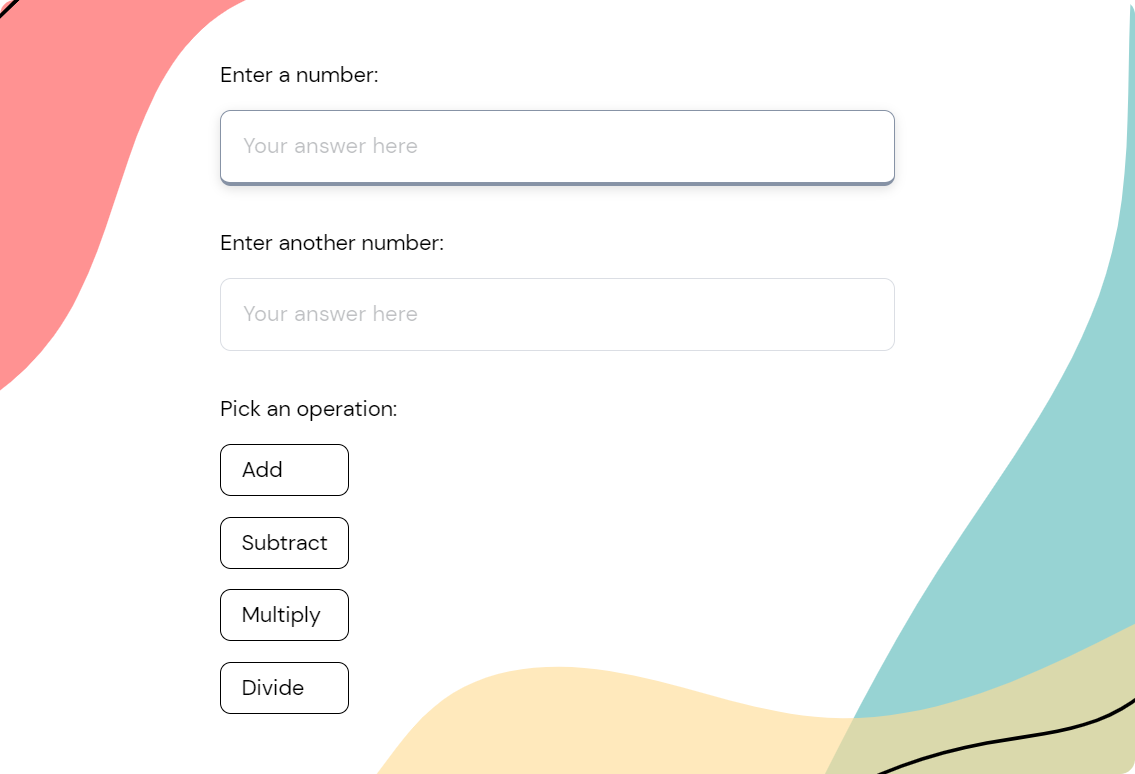
Our form, on the other hand, can be deployed as a web app in a click, shareable to anyone via a public URL link. The users will only interact with the responsive UI, with no access to the code. Each form run executes the script once, so making multiple calculations with involve multiple form runs.
Full scripts
Tkinter
Abstra